Introduction
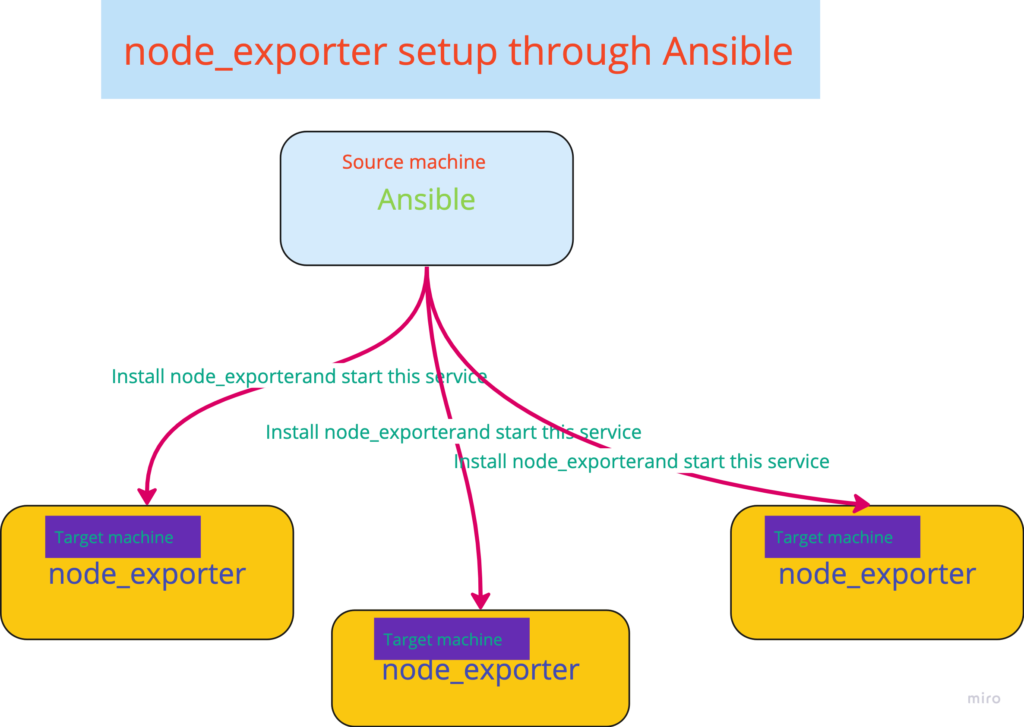
Node exporter setup through Ansible automates its installation and customization at scale. Node exporter is an agent service that Prometheus uses to scrape the target’s metrics (like CPU, RAM, disk, etc). Manually setting it up on several target instances is an error-prone and boring activity.
In the dynamic landscape of system administration, where efficiency is paramount, streamlining the setup of Node Exporter through Ansible emerges as a game-changer. This concise guide distills the process into four straightforward steps, offering a seamless journey toward automation and enhanced operational effectiveness.
As we delve into the intersection of Ansible’s power and the robust functionality of Node Exporter, you’ll discover how this approach not only saves time but transforms the setup into an effortlessly managed task. Let’s embark on a journey that empowers you to harness the full potential of your infrastructure with simplicity and precision.
Prerequisite
- You should know the basics of node-exporter, Learn it from node-exporter
- Learn the basics of Ansible from Ansible-guide.
- Install ansible (needed for ansible-playbook command to work)
- You should know how the ansible-playbook command is executed.
- Create an ansible_hosts file and add your server there, also you should know how to put your server details in the ansible_hosts file
- basics of ssh
What is Node Exporter?
Node Exporter, an integral component of the Prometheus monitoring ecosystem, facilitates comprehensive insights into system health. This lightweight agent extracts crucial metrics from Linux, Windows, and macOS servers, delivering essential data for performance monitoring. Key exported metrics encompass CPU usage, memory utilization, disk I/O, network activity, and system load. With Node Exporter, administrators gain a granular understanding of server performance, enabling proactive identification and resolution of potential bottlenecks. This transparency empowers efficient resource allocation, ensuring optimal operation and resilience across diverse computing environments.
Node Exporter Setup through Ansible in 4 Steps
Step 1 – Create the required directories and files as described below
- Create
ansibledirectory (or any other name that you like) - Create a
playbooksfolder inside it - Create
node-exporter-playbook.ymlfile inside playbooks
cd /path/to/ansible
mkdir playbooks
touch node-exporter-playbook.yml
Step 2 – Add the below contents in node-exporter-playbook.yml
---
- name: Setup node-exporter service
  hosts: my_server
  vars:
    version: 1.4.0
  gather_facts: no

  tasks:
    - name: Install wget package
      apt:
        name: wget
        state: latest
        update_cache: yes
      become: yes

    - name: Download node exporter
      command: wget https://github.com/prometheus/node_exporter/releases/download/v{{version}}/node_exporter-{{version}}.linux-amd64.tar.gz

    - name: Extract node exporter archieve
      command: tar xvfz node_exporter-{{version}}.linux-amd64.tar.gz

    - name: Move node-exporter to /usr/local/bin
      command: mv node_exporter-{{version}}.linux-amd64/node_exporter /usr/local/bin/
      become: yes

    - name: Create node_exporter user
      user:
        name: node_exporter
        system: yes
        create_home: no
        shell: /bin/false
      become: yes

    - name: Copy node_exporter.service file to /etc/systemd/system
      copy:
        src: ../files/node_exporter.service
        dest: /etc/systemd/system/node_exporter.service
        mode: '0644'
      become: yes

    - name: Restart and enable node exporter service
      systemd:
        name: node_exporter
        state: restarted
        enabled: yes
        daemon_reload: yes
      become: yes
Role-based approach
You can create a node_exporter role and move tasks in the above playbook inside tasks/main.yml. Please follow my post on the role in Ansible (take this as an exercise).
Sample ansible_hosts file contents
# ansible_hosts

##servers#######
my_server
Note: my_server must be accessible through SSH
Step 3 – Playbook Execution
cd /path/to/ansible

ansible-playbook playbooks/node-exporter-playbook.yml -i ansible_hosts
Step 4 – Validation
open http://<my_server_public_ip>:9100 in the browser and it should give the default output for your server.
Note: Change my_server_public_ip to your target’s IP.

Key takeaways on Node exporter setup
- Learn about commands for node exporter setup
- How to convert those commands into ansible tasks and create a playbook out of it.
- How to configure node exporter setup
Conclusion
In conclusion, streamlining the Node Exporter setup through Ansible epitomizes the efficiency and simplicity that automation can bring to system monitoring. By condensing the deployment process into a single playbook, this approach minimizes the complexities associated with configuring and launching Node Exporter instances across multiple systems. This not only enhances the accessibility of this critical monitoring tool but also ensures a swift and standardized setup for monitoring system metrics. This approach is automated, scalable, and standard. It also removes human error from setup tasks and makes them repeatable.
The power of Ansible shines through in its ability to make the deployment of Node Exporter setup seamless, allowing system administrators and DevOps teams to focus more on utilizing the monitoring data for enhanced performance insights rather than navigating through intricate setup procedures.
![]()
2 thoughts on “Node Exporter Setup through Ansible in Just 4 Easy Steps!”